
May 25, 2017
Back to School, Decor, DIY Home, Everyday Crafts, Gifts, Jewelry and Fashion, Wood

It’s that time again! Whether your kids are the lucky ones with a few school days left, or the end is still weeks away – it’s not too early or late to think about teacher gifts. Apples will always be the original gift theme, but as crafters our favorite classic school motif is the pencil. The No.2 represents endless possibilities – not only with what it can make, but also what it can be made into. Here are 10 pencil presents that are on-point whether you want to give a stylish, sweet, or functional gift.
1. Design Mom transforms the basic school supply into three chic jewelry pieces (above), each with their own flair. The brooch highlights the honeycomb shape while the necklaces play with grown up rainbow patterns.
2.
 Earn an easy A+++++ with this oversized pencil bank. Whether your teacher takes it home to save spare change or keeps it in school for contributions towards a class pet, it’s sure to collect as many smiles as it does coins. Damask Love shares the genius instructions.
3.
 “Refreshing” will be the new word you associate with pencil pouches after making a pack of these cute gifts from Design Eat Repeat. Set your teacher up for a smooth transition from school to summer with sunny straws and lemonade mix.
4.
 A rainbow vase made from pencils will compliment whatever flowers fill it. Fab Furnish provides an easy pencil vase how-to.
5.
 Give your teacher a colorful resting place for her morning beverage. This DIY eye-popping pencil coaster will provide an extra energy boost. (via Consumer Crafts)
6.
 When stacked, a handful of gumballs becomes a clever graphic abstraction of a pencil. Though Kara’s labels say “Back to School”, we think they’d make a perfect “School’s Out” treat too.
7.
 Wrap all your teacher’s favorite treats in colored paper to create old school No.2s. Add Pink Pearl erasers for extra credit! Lily Shop shows you how.
8.
 Lily Cupcake shows you how to turn an ordinary frame into a work of art that will give extra umph to whatever photo it holds.
9.
 Sometimes a classic needs to be remixed. Pencil Stickers will let your teacher customize her writing implements to match her mood and make grading papers a little more enjoyable – ok tolerable.
10.
 King Midas would definitely approve of this all gold pencil pendant from Lovely Indeed . It’s sure to inspire envy in the teacher’s lounge.
May 11, 2017
Everyday Crafts, Gifts, Holidays, Jewelry and Fashion, Mother's Day

What do moms really want for Mother’s Day? To sleep late? A whine-free day? An undisturbed shower? Wishful thinking, friends…that’s all too much to ask!
Here’s a cute craft that kids can make for you (let’s face it…moms, you are the ones reading this), so just copy and paste this link into an email for your partner and have a Happy Mother’s Day!
What you need:

May 10, 2017
Decor, DIY Home, Everyday Crafts, Nature, Spring, Styling, Summer

Spring has officially sprung here in New York, though the wacky temperatures have caused the plants some major confusion. Bringing a little greenery indoors ensures you can give it the care it needs no matter the weather outside. Even if you think of yourself as having a black thumb, the continuing trend of air plants and succulents are, almost guaranteed, foolproof. I’ve been seeing lots of creative ideas for potting plants, but many of them highlight the planter rather than the plant itself and I find myself drawn to the more organic options. The ten ideas below let the plants keep the focus and add an extra natural element to the great indoors!
1.

The presence of plants purifies air, but why stop there? Jojotastic’s pretty planters (both above) add clarifying crystals for a one-two punch of good energy.
2.

Even after all the recent Easter eggs, eggshells still feel fresh if they’re paired with perky succulents! The Kitchn shows you how.
3.

Though I usually feel like seashell decorations should be relegated to beach houses, this gravel filled planter would fit in a city home as well as in a seaside one. (via Balcony Garden Web)
4.

Petit Beast‘s whimsical take on sea shell planters transform air plants into jelly fish – I actually had to do a double take when I first saw them!
5.

I love how these stone bases from Rosdale Organic Life let the plants’ “personalities” shine. Maybe it’s just me, but I totally see a group of punk ROCKers (pun intended).
6.

Forget vases, the freshest way to display a natural centerpiece is in a natural planter. Ehow shows you how to construct this piece of table decor that will continue to charm long after your dinner party.
7.

These planters (via pinterest) might not technically be all natural, but the paint highlights the plants’ natural beauty! I also like how the wood slices echo the faux animal head trend.
8.

For the tiniest natural planters possible, acorns take first place. A grounded alternative to all the floating options, these little pockets of soil are great for herbs. Gardenoholic provides the easy DIY.
9.

This is probably an idea to save for a little later, but I love how clean and bright these pumpkin planters from Momtastic look. They’re the opposite of Halloweenish and could be used into the winter as pumpkins can be harvested through December.
10.

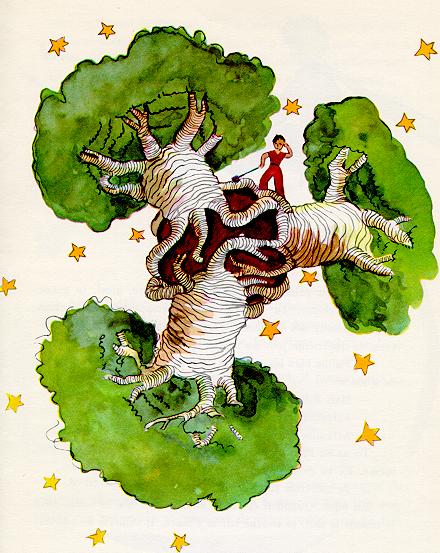
One of the trickier, but most impressive, planter styles is based on the Japanese technique of hanging moss balls called Kokedama. Sand and Sisals’s magical floating version bring to mind the baobab trees from the Little Prince.
April 27, 2017
Birthdays, Decor, Favors, Food, Gifts, Parties

Everyone has their own threshold when it comes to DIY’ing birthday parties…some want to start from a totally blank slate, while others choose one thing to craft to make the party special. I have run the spectrum with my kids, but I must say admit that it does get exhausting (even for a seasoned crafter like myself) to DIY everything!
In the May 2017 issue of FamilyFun, I got to explore tons of DIY birthday party ideas using balloons, paper party hats, streamers, and cupcakes. Here are four highlights, but be sure to visit FamilyFun to get 13 more awesome DIY ideas!
Pizza hat above: Cut out red “pepperoni” and green “C”-shaped “peppers” from red and green paper. Cut out mushroom shapes from gray paper. Attach to a yellow party hat with glue dots. Twist brown kraft paper and secure around the edges of the hat with hot glue to make the crust.

Using painter’s tape, plan out the shape of the number on the wall. Blow up a collection of 5” mini dart balloons and 11” party balloons, knotting each (we used about 50). Use loops of white gaffer tape (get it on Amazon) to attach them to the wall. Layer and tuck in extra balloons on top for a fuller look.
Attach a tabletop celebration arch (available at party supply stores) to your table. You’ll need about 80 fiveinch balloons. Inflate two balloons and knot the ends together. Repeat with another pair, then twist both sets together so you create a clover. Set aside and repeat with remaining balloons. To assemble the arch, twist each clover set onto the frame. Use doublestick tape to attach additional balloons.
Make It Yours: Go with black, gray, and red for Star Wars fans; yellow and blue for Minion lovers; or green and black for little Minecrafters.

On top of iced cupcakes, arrange Starburst Minis in lines with alternating colors. Swap in any favorite mini candy and colors.

Cut 60 strips of streamers about 54 inches long (for a three-color pattern, buy at least one roll per shade). Measure three equidistant points around a hula hoop and tie on three 2-foot-long pieces of fishing line. Knot them together about 18 inches from the top of the hoop, and hang it in your work area. Loop the end of a streamer around the hoop, and use double-stick tape to secure it. (Be sure to tape the loop to the paper and not the hoop so it slides.) Overlap each one slightly and alternate colors. To make the top, cut about 30 strips about 24 inches long. Tape each streamer to the outside edge of the hoop—but this time, use one strip for every two on the bottom, matching the colors if you prefer. Once you’ve attached four or five, gather and layer the ends and tape together; then secure to the center fishing line. Repeat all around the hoop. Tie a ribbon or short streamer around the top.

If you are looking for a new way to dye eggs with your kids this Easter, this is it. This egg dying technique passes every test that I can think of…

This marker transfer method has all of the above and more. Click here to watch my how-to video or read below…
What you’ll need:
1 Color on the paper towel in any pattern. You can do stripes, polka dots, plaid, etc. Make sure to color a large enough area that it will wrap around the egg.
2 With the paper towel on the plate, spritz it wth the vinegar/water solution.
3 Wrap the paper towel around the egg, and cinch in the back with a rubber band.
4 Spritz the egg again, and rub the surface of the paper towel to help transfer the ink.
5 Once it’s dry, about 20 minutes or so, unwrap the egg to reveal the masterpiece.


