Bonjour, mes amis! If you follow along on Instagram, you may know that I spent the last month in France with my husband and two kiddos. Michael and I both live the freelance life, so we realized that if we don’t take advantage of this freedom that we have, then what’s the point of all this next-gig and health-insurance stress?
So after 28 days of baguettes, sunflowers, Ed Sheeran sing-a-longs (we spent long hours in the car and he became our go-to soundtrack), chocolate croissants, and free-range country escapades, I can’t get the joie de vivre of France of my head!
So here’s a little love-letter to France, in the form of craft. Stay tuned for more posts on our adventures in the coming weeks!
1. Is it wrong that I want to dress my daughter like Madeline all the time? Maybe I’ll be reasonable and wait till Halloween to try out Making Nice in the Midwest‘s adorable costume version.
2.
Bisou-bisou; kiss-kiss. It’s hard to get used to the double-kiss, but then it’s hard to forget it too! If I could make this awesome balloon installation fromMartha Stewart Weddings permanent on my wall, I totally would.
3.
It’s hard to get more patriotic than these French flag goodie bags from Oh Happy Day. Fill clear pouches with red, white, and blue jelly beans, tie on a paper Eiffel Tower and voilà!
4.
French desserts that will stay fresh, and help preserve your memories too! How cute are these macaron-photo holders from A Kailo Chic Life?
5.
Is there anything more nostalgic than air mail? My Poppet shows you how to turn an empty cereal box into a giant french envelope perfect for saving photos, love notes, or paper souvenirs.
6.
These cheery clay magnets from Cakies embrace the bold profiles of Paris’s best looking buildings. Perfect for holding up trip photos (or giving grocery lists a little pizzaz).
7.
Scent is the ultimate memory jogger and, while I save up for the next plane ticket, I’ll use a lavender sachet to transport me to the French countryside. These are an easy sewing project for little hands so my kids can make them with me. (via Pink Pistachio)
8.
If you ask my kids about their favorite part of Paris they’ll definitely say the carousels! It seemed like there were play structures everywhere we went, especially the classic French carousels. This mini version from Oh Happy Day has all the charm of the real thing, it even spins!
9.
Made by Joel gives you another way to embrace little landmarks. With his free printables you can literally carry the city in your pocket and re-create your memories wherever you go.
10.
It’s hard to leave Paris without scooping up at least a few little Eiffel Towers. The iconic souvenir comes in all sizes, which makes it the perfect material for all sorts of nostalgic crafts. Add a little blue and red glitter for Paris in a jar. (via Pinterest)
Or, add hooks for super simple earrings like these from Hello Glow.
And what’s more French than an Eiffel Tour + a tart tin? Glue them together and add a coat of spray paint to make a nostalgic trinket dish (featured at the top of the post).
I’m at the stage where most of my closest friends have had their babies, so when Jane, my frousin (friend AND cousin-in-law), announced that she was pregnant, I was elated! First because, obviously, we’d have a new baby doll to love and play with, and second because I knew I’d get to throw her a shower. (Little fact…I set up Jane and her husband Micah, my husband’s first cousin. Jane and I worked together at Parents magazine and now she’s the Editor-in-Chief of Junior Scholastic magazine.)
Jane is definitely not the traditional baby-blue booties or pale-pink pacifier type, so my co-hosts and I knew that we wanted a more modern baby shower experience for her. So we…
…invited the men! Child-rearing is not just the momma’s job, so why shouldn’t the dudes get to enjoy the yummy party food and the shower of love?
…colored it neon! For as long as I’ve known Jane, one of her defining characteristics is her impeccable taste and ahead-of-the-curve style. Baby blue and butter yellow (they’re having a boy!) was not going to fly, so we went with brights!
…designed our own shower traditions!
When I had my son, I loved how my seasoned parent-friends gave me all of their favorite books, so on the invite we asked the guests to each bring an unwrapped book to start this little guy’s library. At the door, everyone placed their book in a cute little book caddy that Jane and Micah got to take home.
In addition to the classics that friends and family brought, we also wrote our own collective baby book for Baby SommBaum (a combo of their last names!). Here were the instructions at the book-writing station:
Pick a word from the bag.
Write and illustrate your page of the book using that word. You don’t have to draw the word, but the word must appear in the text.
ONE RULE! You can only look at the ONE PAGE preceding yours.
Write your name(s) on the top line.
Draw in the blank space.
Write text on the lines.
Friends mingled about and took turns illustrating and writing their pages. (I promise to do a post on the final board book once it’s done!)
And then of course, it was gift opening time! In between each gift, we went around the room and offered advice to the parents-to-be…either advice as a parent or advice from having parents (there were some childless friends in the room). It was a sweet, and often laughter-inducing, way to give our friends a personal intro into parenthood.
This well-designed monitor doesn’t sacrifice style for functionality, and there is nothing more comforting than knowing you can always have eyes and ears on your little ones, even when you’re not in the room. Most VTech baby monitors come with up to 1,000 feet of range, so you can be downstairs in your kitchen blending carrots and mashing bananas, while still hearing, seeing, and even being able to talk back to your baby from right where you are. And that gift is priceless!
Now I’m ready for more shower action…wedding, baby, I’ll take whatever I can get!
I was selected for this opportunity as a member of CLEVER and the content and opinions expressed here are all my own.
I can’t begin to count the number of parties that I have crafted in my lifetime. From the pretend ones I would throw for my dolls when I was young to the holiday and birthday parties I’ve styled for magazines to the celebrations that I throw IRL for my own kids…I lost count ages ago. And as any stylist, party planner, or home entertainer would tell you, we are always looking for new and different ways to make the personal, creative details shine like they haven’t before.
When Brother asked me to partner with them on the launch of the P-touch Embellish, their new ribbon and tape printer, I jumped in headfirst. I’m always eager to get my hands on a new tool that can add personal touches to parties, crafts, gift wrapping and more. For the P-touch Embellish launch event in New York City, I designed projects for a birthday party (my fave, of course), a bridal shower, a baby shower, gift-wrapping, general crafts, and a festive brunch.
I first saw the P-touch Embellish at the Creativation Show (the mecca of all things crafts) back in January, where I watched a demo of the ribbon printing at the Brother booth. This little machine that you can hold in your hands as you’re binge-watching your favorite shows can print 14 fonts, over 90 text borders, and over 400 little symbols to add detail, style, and personalization to your projects. There are 5 satin ribbons and 9 adorable patterned tapes to choose from, so to find one that matches your event is super easy. You can buy the P-touch Embellish machine, the ribbons, and 6 of the patterned tapes at Michaels.com and select Michaels stores; the other 3 patterned tapes are available at Brothermall.com
This carnival birthday party that I crafted got me excited because in addition to the personalized lollipop-favor ribbons and the custom-printed balloon strings, I used the P-touch Embellish to craft cute party activities…A Spinner Game, Fishing Game, and a Can Toss Game (see below for the how-to instructions).
Whether you are designing your daughter’s unicorn party favors, your bestie’s baby shower tablescape, or wrapping gifts at holiday time, the P-touch Embellish has everything you need (and then some) for those sweet, heartfelt, personalized touches.
Trace the cardboard circles onto the scrapbook papers and cut them out. Hot glue the paper to the cardboard.
Divide the circle into eight sections. Print the words “SPIN THE WHEEL” on 4-inch piece of the red gingham tape and adhere in between each pie slice. Print the prize or action words on the mint chevron tape and adhere in each slice.
Hot-glue 3 beads to the three points of the fidget spinner, and hot glue the cardboard coaster to the beads. Hot-glue the center of the fidget spinner to the center of the 12-inch game board.
Print arrows onto the yellow star tape and adhere to the small cardboard circle. Glue the red star in the center.
Hot-glue rope around the outer edge of the game board and create a loop at the top for hanging.
Using the continuous text function on the P-touch Embellish, print “CATCH ME IF YOU CAN” on a 30-inch piece of ribbon. Tie one end to the dowel and hot-glue a magnet onto the other end.
Cut out 6-8 fish from scrapbook paper. Hot-glue the washers as the eyes.
Print point values on the various patterned tapes and adhere them to the back of the fish.
When you’re a crafter and you travel to a different country, naturally you check out the craft supplies there. And when that country is France, your expectations are high because of the elegance, style, and tradition of the handmade.
We discovered the store Cooleurs and there I fell in love with the products and kits made by Rico Designs. Check out their gorgeous style, photos, and craft supplies!
I’m always writing how-to text where I say “just pop into the backyard and grab a stick”…or a pinecone…or a bunch of leaves, but, my experience with nature crafting just isn’t like that IRL. I live in an urban setting where I have to walk a few blocks to get to a park, so for me to just “pop” outside and grab the perfect stick is really more of an excursion than a “pop.”
So while in rural France for a month (oh yeah, if you don’t follow along on Instagram, you may not know that I’m with my family in France for a month), I can literally pop, hop, or skip outside to get anything that I could possibly want, including these weeping willow vines, fresh cut lavender, a vast selection of wildflowers, and the most beautiful roses I’ve ever seen.
Sommer and I did some scavenging and, with no help from anything human-made, we made a crown and a necklace from everything in our glorious backyard. She became a serious gatherer of Mother Nature’s treasures, and she art-directed me as I put the pieces together.
Full disclosure, this project makes me yearn to have these free craft supplies at my fingertips at all times…instead of buying pinecones at Michaels, I’m loving the fact that there’s a much cheaper source out there!
It’s that time again! Whether your kids are the lucky ones with a few school days left, or the end is still weeks away – it’s not too early or late to think about teacher gifts. Apples will always be the original gift theme, but as crafters our favorite classic school motif is the pencil. The No.2 represents endless possibilities – not only with what it can make, but also what it can be made into. Here are 10 pencil presents that are on-point whether you want to give a stylish, sweet, or functional gift.
1. Design Mom transforms the basic school supply into three chic jewelry pieces (above), each with their own flair. The brooch highlights the honeycomb shape while the necklaces play with grown up rainbow patterns.
2.
Earn an easy A+++++ with this oversized pencil bank. Whether your teacher takes it home to save spare change or keeps it in school for contributions towards a class pet, it’s sure to collect as many smiles as it does coins. Damask Love shares the genius instructions.
3.
“Refreshing” will be the new word you associate with pencil pouches after making a pack of these cute gifts from Design Eat Repeat. Set your teacher up for a smooth transition from school to summer with sunny straws and lemonade mix.
4.
A rainbow vase made from pencils will compliment whatever flowers fill it. Fab Furnish provides an easy pencil vase how-to.
5.
Give your teacher a colorful resting place for her morning beverage. This DIY eye-popping pencil coaster will provide an extra energy boost. (via Consumer Crafts)
6.
When stacked, a handful of gumballs becomes a clever graphic abstraction of a pencil. Though Kara’s labels say “Back to School”, we think they’d make a perfect “School’s Out” treat too.
7.
Wrap all your teacher’s favorite treats in colored paper to create old school No.2s. Add Pink Pearl erasers for extra credit! Lily Shop shows you how.
8.
Lily Cupcake shows you how to turn an ordinary frame into a work of art that will give extra umph to whatever photo it holds.
9.
Sometimes a classic needs to be remixed. Pencil Stickers will let your teacher customize her writing implements to match her mood and make grading papers a little more enjoyable – ok tolerable.
10.
King Midas would definitely approve of this all gold pencil pendant from Lovely Indeed . It’s sure to inspire envy in the teacher’s lounge.
What do moms really want for Mother’s Day? To sleep late? A whine-free day? An undisturbed shower? Wishful thinking, friends…that’s all too much to ask!
Here’s a cute craft that kids can make for you (let’s face it…moms, you are the ones reading this), so just copy and paste this link into an email for your partner and have a Happy Mother’s Day!
What you need:
2 washers with a 3/4″ to 1″ opening
Nail polish (raid mom’s drawer!)
2 photographs printed to fit the washer’s opening
Beads
Thin string
Scissors
Strong glue
Paint the washers with nail polish and let dry.
Cut photographs to fit the opening of the washers; leave a little room around the image.
Make tassels with beads or string and glue to the inside of one washer.
Glue images in place in the washer’s opening.
Cut a small loop from the string and glue it to the top as the pendant loop.
Spring has officially sprung here in New York, though the wacky temperatures have caused the plants some major confusion. Bringing a little greenery indoors ensures you can give it the care it needs no matter the weather outside. Even if you think of yourself as having a black thumb, the continuing trend of air plants and succulents are, almost guaranteed, foolproof. I’ve been seeing lots of creative ideas for potting plants, but many of them highlight the planter rather than the plant itself and I find myself drawn to the more organic options. The ten ideas below let the plants keep the focus and add an extra natural element to the great indoors!
1.
The presence of plants purifies air, but why stop there? Jojotastic’s pretty planters (both above) add clarifying crystals for a one-two punch of good energy.
2.
Even after all the recent Easter eggs, eggshells still feel fresh if they’re paired with perky succulents! The Kitchn shows you how.
3.
Though I usually feel like seashell decorations should be relegated to beach houses, this gravel filled planter would fit in a city home as well as in a seaside one. (via Balcony Garden Web)
4.
Petit Beast‘s whimsical take on sea shell planters transform air plants into jelly fish – I actually had to do a double take when I first saw them!
5.
I love how these stone bases from Rosdale Organic Life let the plants’ “personalities” shine. Maybe it’s just me, but I totally see a group of punk ROCKers (pun intended).
6.
Forget vases, the freshest way to display a natural centerpiece is in a natural planter. Ehow shows you how to construct this piece of table decor that will continue to charm long after your dinner party.
7.
These planters (via pinterest) might not technically be all natural, but the paint highlights the plants’ natural beauty! I also like how the wood slices echo the faux animal head trend.
8.
For the tiniest natural planters possible, acorns take first place. A grounded alternative to all the floating options, these little pockets of soil are great for herbs. Gardenoholic provides the easy DIY.
9.
This is probably an idea to save for a little later, but I love how clean and bright these pumpkin planters from Momtastic look. They’re the opposite of Halloweenish and could be used into the winter as pumpkins can be harvested through December.
10.
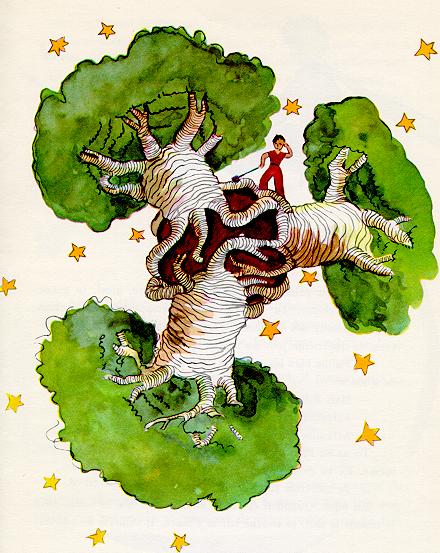
One of the trickier, but most impressive, planter styles is based on the Japanese technique of hanging moss balls called Kokedama. Sand and Sisals’s magical floating version bring to mind the baobab trees from the Little Prince.
Everyone has their own threshold when it comes to DIY’ing birthday parties…some want to start from a totally blank slate, while others choose one thing to craft to make the party special. I have run the spectrum with my kids, but I must say admit that it does get exhausting (even for a seasoned crafter like myself) to DIY everything!
In the May 2017 issue of FamilyFun, I got to explore tons of DIY birthday party ideas using balloons, paper party hats, streamers, and cupcakes. Here are four highlights, but be sure to visit FamilyFun to get 13 more awesome DIY ideas!
Pizza hat above: Cut out red “pepperoni” and green “C”-shaped “peppers” from red and green paper. Cut out mushroom shapes from gray paper. Attach to a yellow party hat with glue dots. Twist brown kraft paper and secure around the edges of the hat with hot glue to make the crust.
Using painter’s tape, plan out the shape of the number on the wall. Blow up a collection of 5” mini dart balloons and 11” party balloons, knotting each (we used about 50). Use loops of white gaffer tape (get it on Amazon) to attach them to the wall. Layer and tuck in extra balloons on top for a fuller look.
Attach a tabletop celebration arch (available at party supply stores) to your table. You’ll need about 80 fiveinch balloons. Inflate two balloons and knot the ends together. Repeat with another pair, then twist both sets together so you create a clover. Set aside and repeat with remaining balloons. To assemble the arch, twist each clover set onto the frame. Use doublestick tape to attach additional balloons.
Make It Yours: Go with black, gray, and red for Star Wars fans; yellow and blue for Minion lovers; or green and black for little Minecrafters.
On top of iced cupcakes, arrange Starburst Minis in lines with alternating colors. Swap in any favorite mini candy and colors.
Cut 60 strips of streamers about 54 inches long (for a three-color pattern, buy at least one roll per shade). Measure three equidistant points around a hula hoop and tie on three 2-foot-long pieces of fishing line. Knot them together about 18 inches from the top of the hoop, and hang it in your work area. Loop the end of a streamer around the hoop, and use double-stick tape to secure it. (Be sure to tape the loop to the paper and not the hoop so it slides.) Overlap each one slightly and alternate colors. To make the top, cut about 30 strips about 24 inches long. Tape each streamer to the outside edge of the hoop—but this time, use one strip for every two on the bottom, matching the colors if you prefer. Once you’ve attached four or five, gather and layer the ends and tape together; then secure to the center fishing line. Repeat all around the hoop. Tie a ribbon or short streamer around the top.
If you are looking for a new way to dye eggs with your kids this Easter, this is it. This egg dying technique passes every test that I can think of…
Accessible, non-toxic materials that you already have. Check.
Quick and attention grabbing. Check.
Easy clean-up (of the kitchen and the kid). Check, check.
Moment of magic. Check.
This marker transfer method has all of the above and more. Click here to watch my how-to video or read below…
What you’ll need:
Eggs
Paper towels
Washable markers
Spray bottle with water and vinegar (1:1 ratio)
Rubberbands
A plate
1 Color on the paper towel in any pattern. You can do stripes, polka dots, plaid, etc. Make sure to color a large enough area that it will wrap around the egg.
2 With the paper towel on the plate, spritz it wth the vinegar/water solution.
3 Wrap the paper towel around the egg, and cinch in the back with a rubber band.
4 Spritz the egg again, and rub the surface of the paper towel to help transfer the ink.
5 Once it’s dry, about 20 minutes or so, unwrap the egg to reveal the masterpiece.


 Is it wrong that I want to dress my daughter like Madeline all the time? Maybe I’ll be reasonable and wait till Halloween to try out Making Nice in the Midwest‘s adorable costume version.
 It’s hard to get more patriotic than these French flag goodie bags from Oh Happy Day. Fill clear pouches with red, white, and blue jelly beans, tie on a paper Eiffel Tower and voilà!
 French desserts that will stay fresh, and help preserve your memories too! How cute are these macaron-photo holders from A Kailo Chic Life?
 Is there anything more nostalgic than air mail? My Poppet shows you how to turn an empty cereal box into a giant french envelope perfect for saving photos, love notes, or paper souvenirs.
 These cheery clay magnets from Cakies embrace the bold profiles of Paris’s best looking buildings. Perfect for holding up trip photos (or giving grocery lists a little pizzaz).
 Scent is the ultimate memory jogger and, while I save up for the next plane ticket, I’ll use a lavender sachet to transport me to the French countryside. These are an easy sewing project for little hands so my kids can make them with me. (via Pink Pistachio)
 If you ask my kids about their favorite part of Paris they’ll definitely say the carousels! It seemed like there were play structures everywhere we went, especially the classic French carousels. This mini version from Oh Happy Day has all the charm of the real thing, it even spins!
 Made by Joel gives you another way to embrace little landmarks. With his free printables you can literally carry the city in your pocket and re-create your memories wherever you go.


